Eye Tracking Demo: SVGs as AOIs
Overview
In this demo, our goal is to capture eye tracking gaze data. Specifically, we want to capture the gaze data associated with specific Areas of Interest (AOIs) which are included in the study as SVG shape objects.
A preview of the demo in action is shown below with the red circle providing feedback by indicating the location of the gaze in real time:
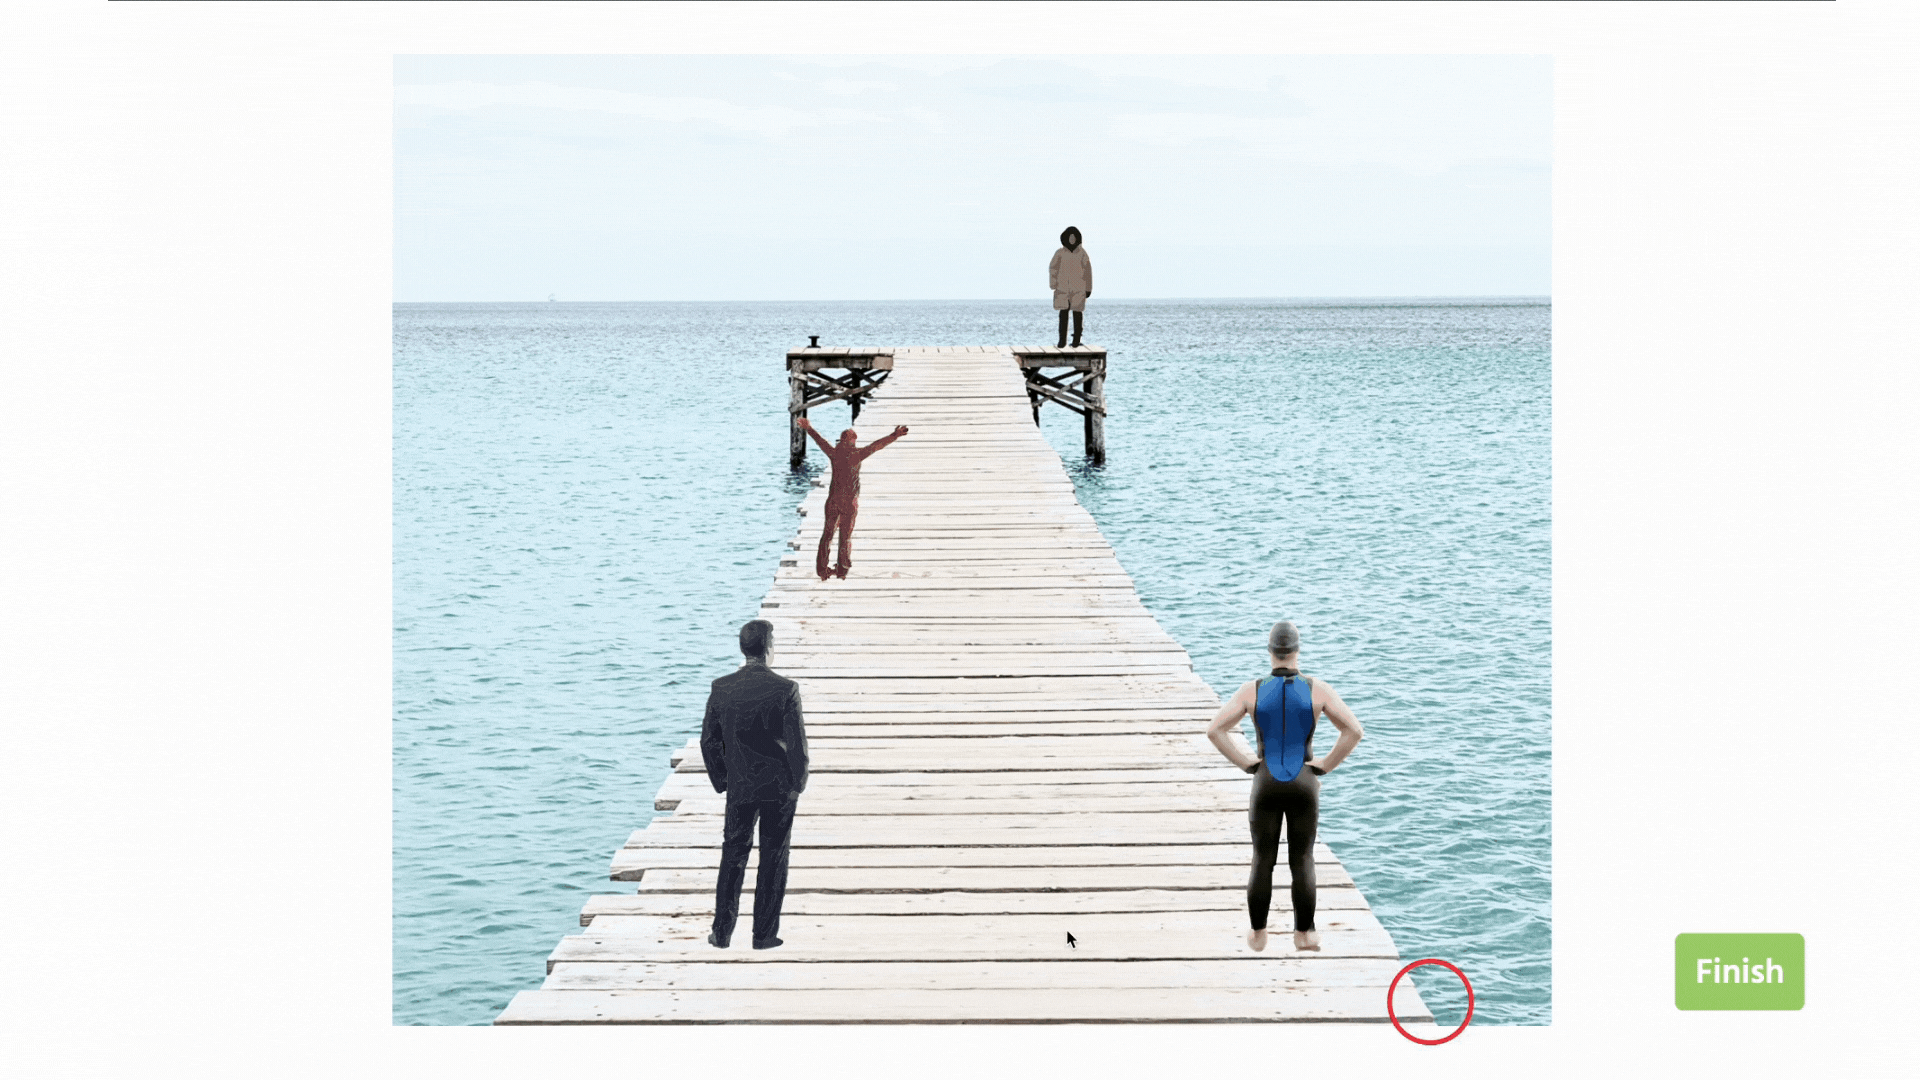
- NOTE: The demo recording was accomplished with a 5.5 minute calibration option; the red circle is an object that represents the participants gaze in real time and the overall set up is explained further below.
Take a look at this quick video that shows the demo in action, as well as a preview of the data recorded at the end:
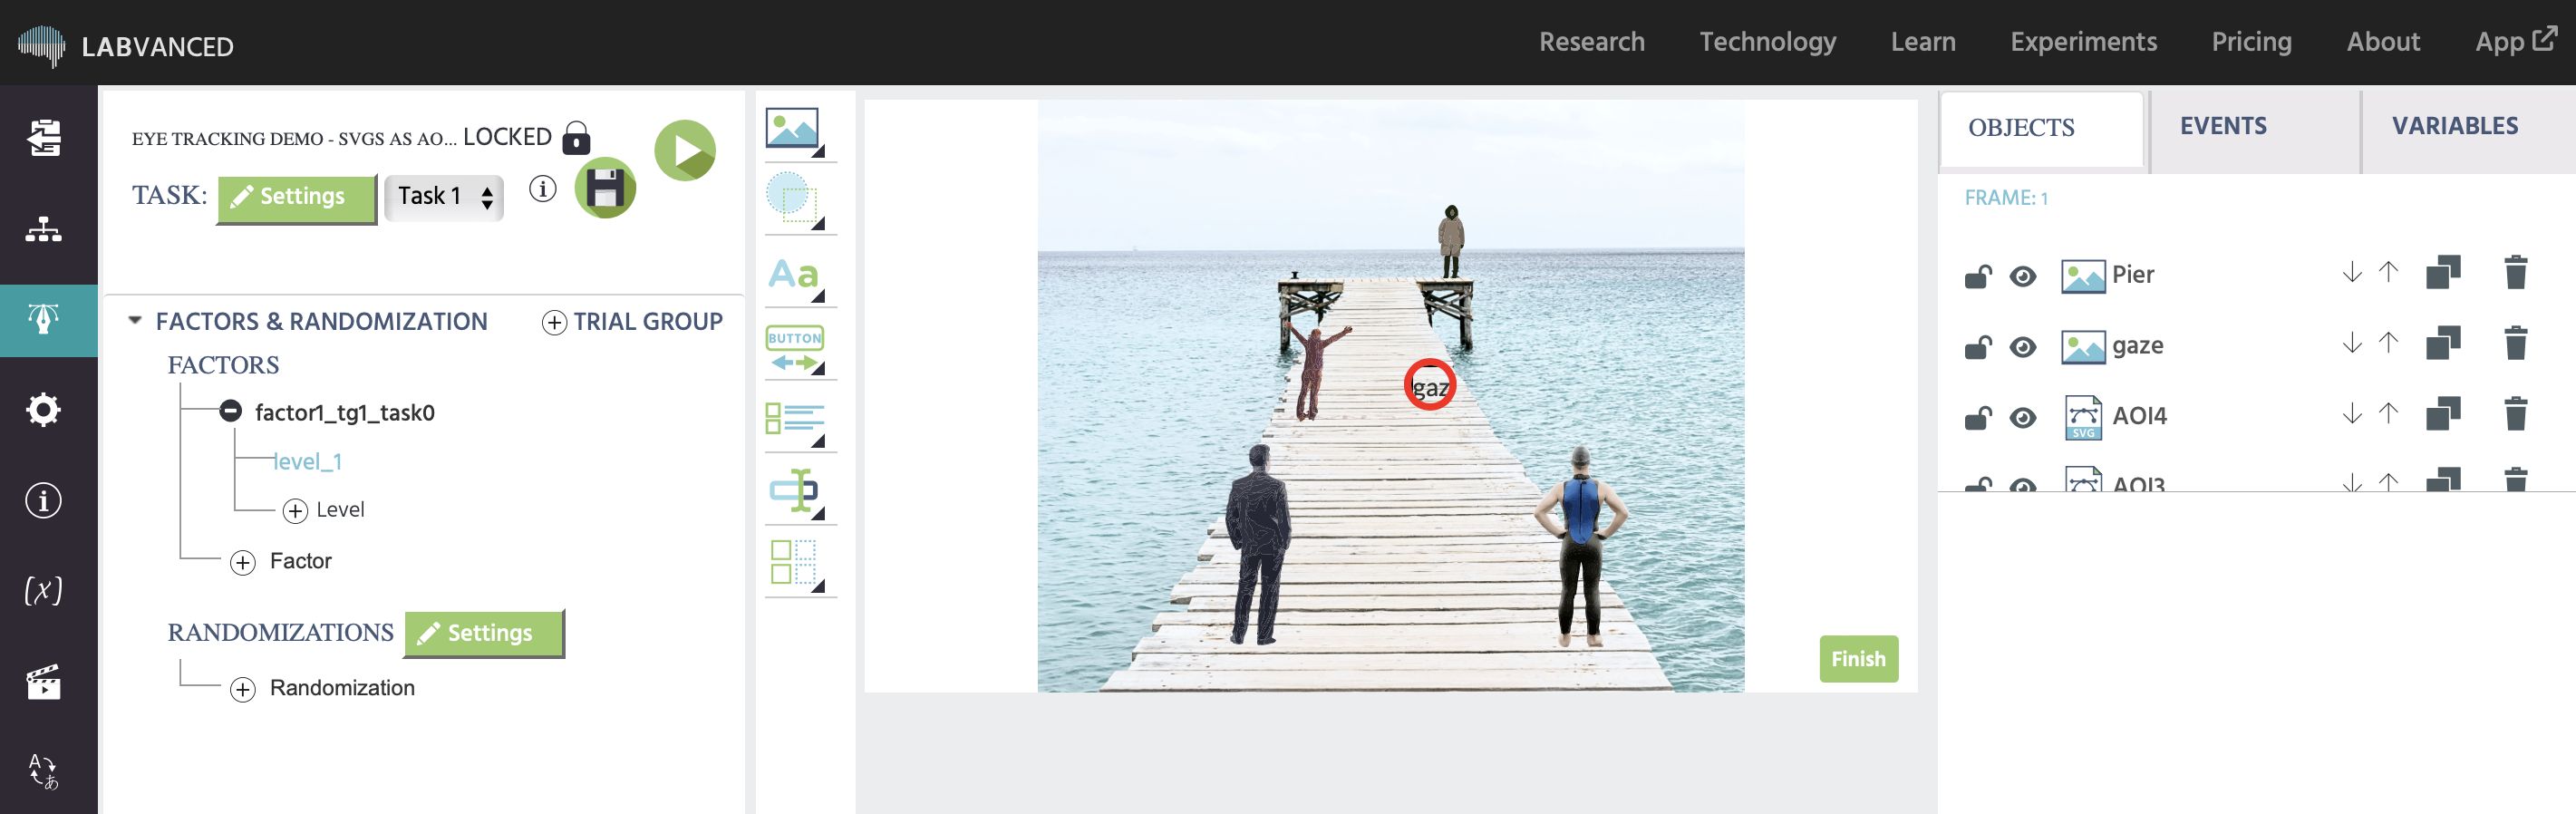
Objects
This demo includes a background image of a pier on which 4 SVG objects of people are placed upon. There is also a gaze feedback object (red circle). For the purposes of this demo, we wanted to represent gaze in real time and this red circle reflects that.
Custom Variables Created
In order to record data, variables are required. A list of all the custom variables that were created for this demo are shown below, accessible via the ‘Variables’ Tab. The image below shows the details and settings for the variables that this demo makes use of:
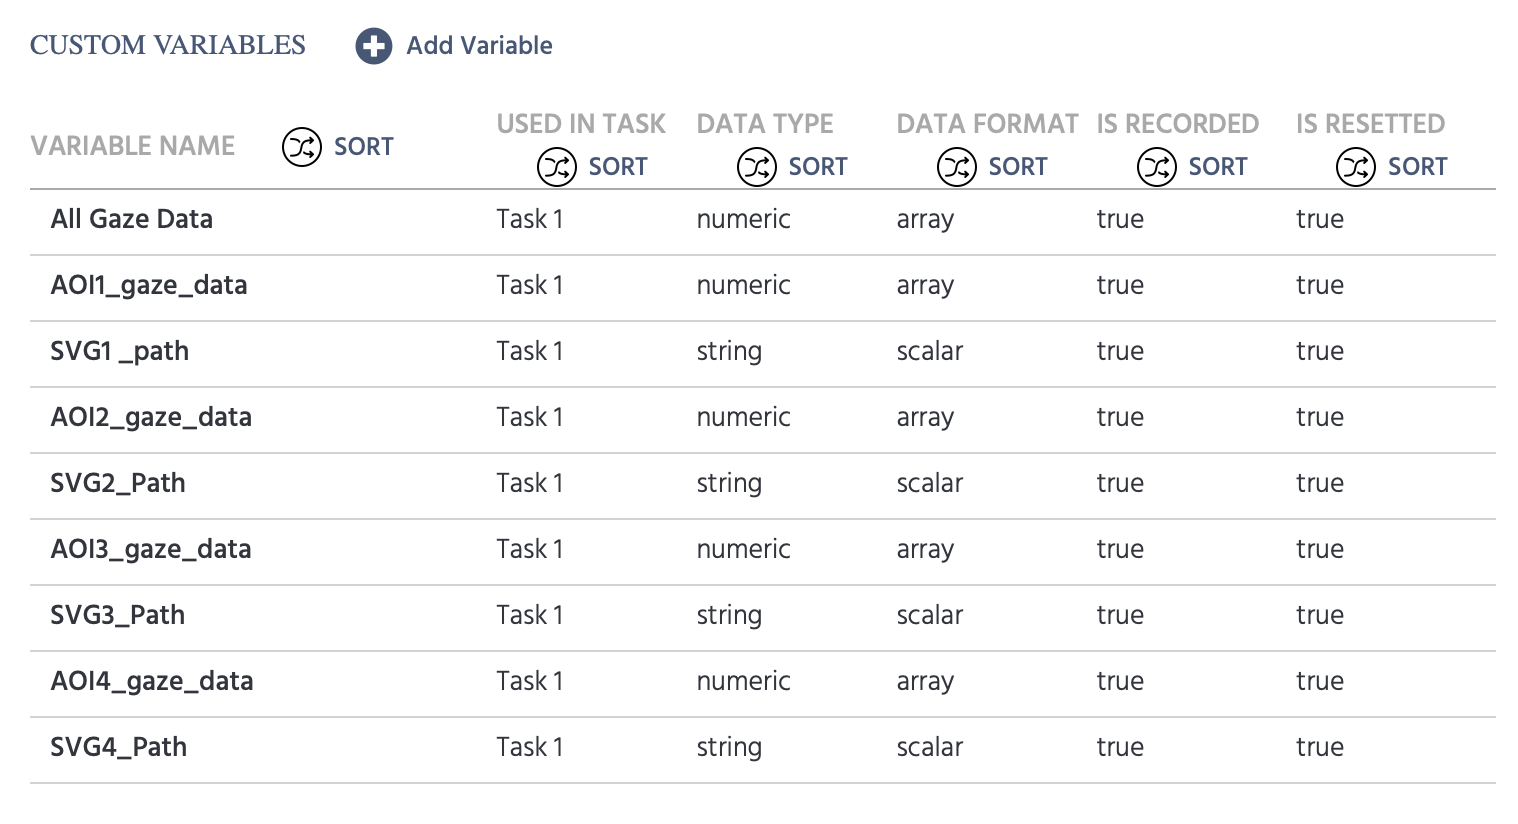
Below is an explanation of the variables and their purpose:
| Variable Name | Description | Record Type |
|---|---|---|
All Gaze Data | Used to store the array of x/y coordinates [X,Y], as well as the Time Capture [T] and the confidence level [C] of the measurement. | All changes / time series |
AOI1_gaze_data | Used to store the array of [X,Y,T,C] when the participant looks at the SVG object named AOI1. | All changes / time series |
SVG1_path | Records the path of the SVG node that the gaze rested upon of AOI1 (explained further below). | All changes / time series |
AOI2_gaze_data | Used to store the array of [X,Y,T,C] when the participant looks at the SVG object named AOI2. | All changes / time series |
SVG2_path | Records the path of the SVG node that the gaze rested upon of AOI2. | All changes / time series |
And so on….
Events Set Up
Since we are interested in capturing gaze data, the following events are used:
- All Gaze Data: This event initiates as soon as the task begins and records eye tracking gaze data continuously.
- AOI Gaze Data: This event initiates as soon as the participant looks at a specific AOI (ie. one of the four people) and records the gaze-related values.
- Finish Experiment: An event that accepts / ends the session and records the data upon the subject clicking the ‘Finish’ button.
Event 1: All Gaze Data
For the first event, we want to accomplish the following:
- record all eye tracking data throughout the duration of the study
- display the detected location of the gaze on the screen in real time (so you as the researcher can have a sense of the webcam tracking when trying out the demo)
Trigger
Thus, we use an eye tracking gaze trigger to initiate this event.

Action
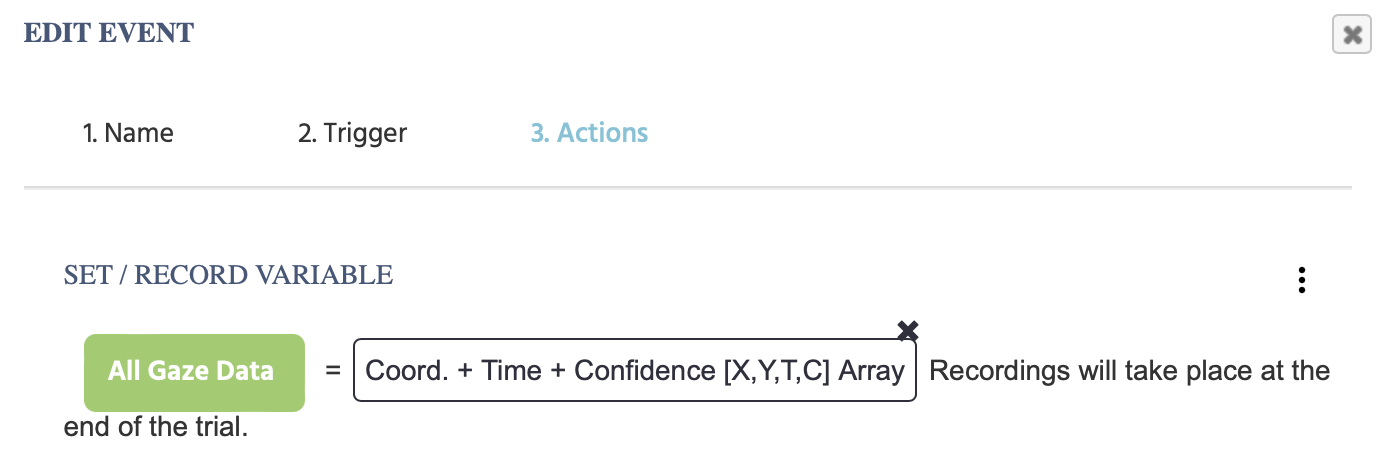
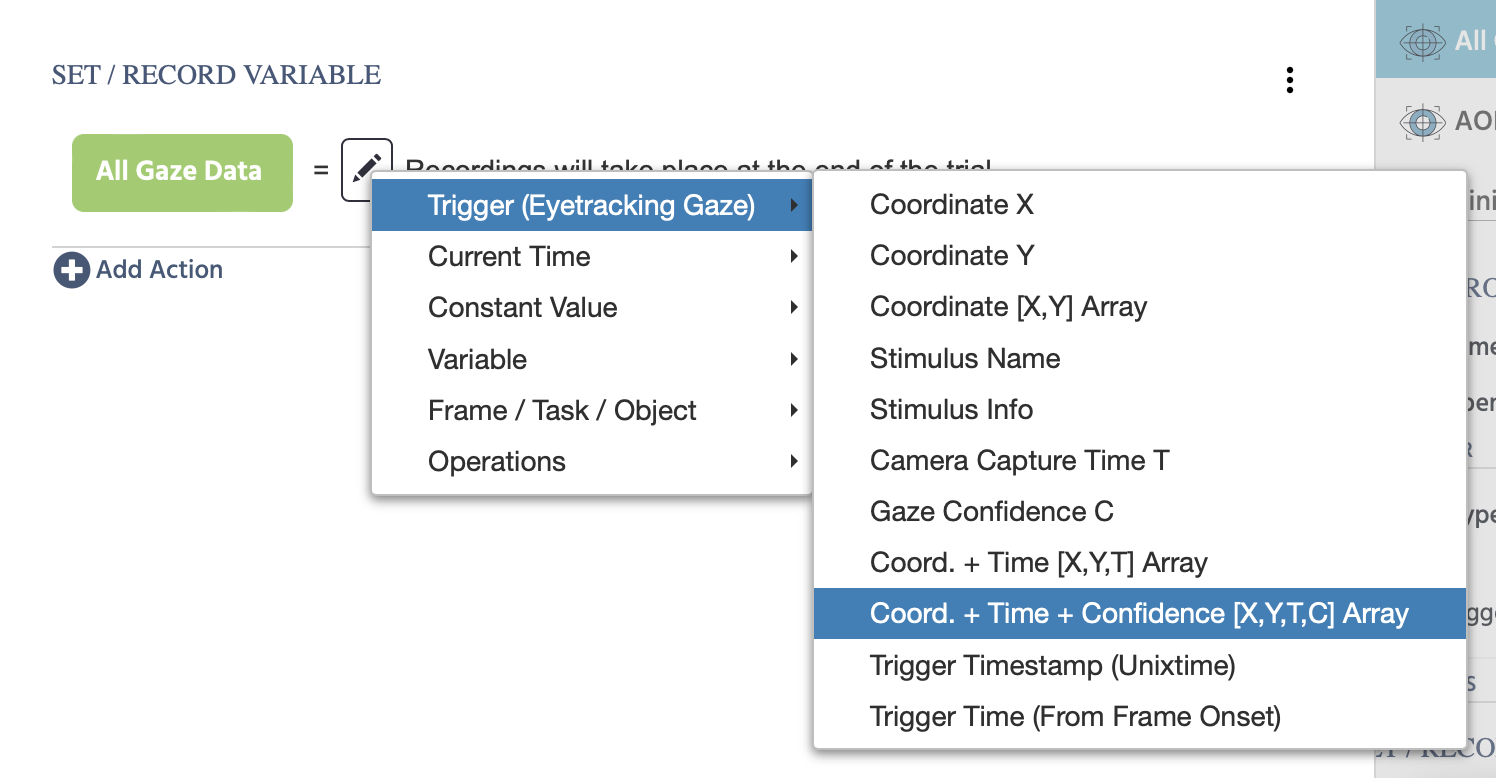
Once gaze is detected, the following actions will occur: First, we call on the All Gaze Data variable that we created earlier in a Set / Record Variable action in order to record the data as [X,Y,T,C] array.
The above is accomplished (as shown below) by clicking the green button, selecting the target variable, then clicking the pencil icon value-select menu and then choosing the [X,Y,T,C] array from the trigger-specific (Eyetracking Gaze) menu, as shown below:
We also add the Set Object Property action in order to set the red circle object (called ‘gaze’) to set its X property equal to the and the Y property set to the coordinate X and the coordinate Y, respectively. In other words, we set the object’s x- and y-values to be equal to the x- and y-coordinates… ultimately, this is what makes the object move in real-time.
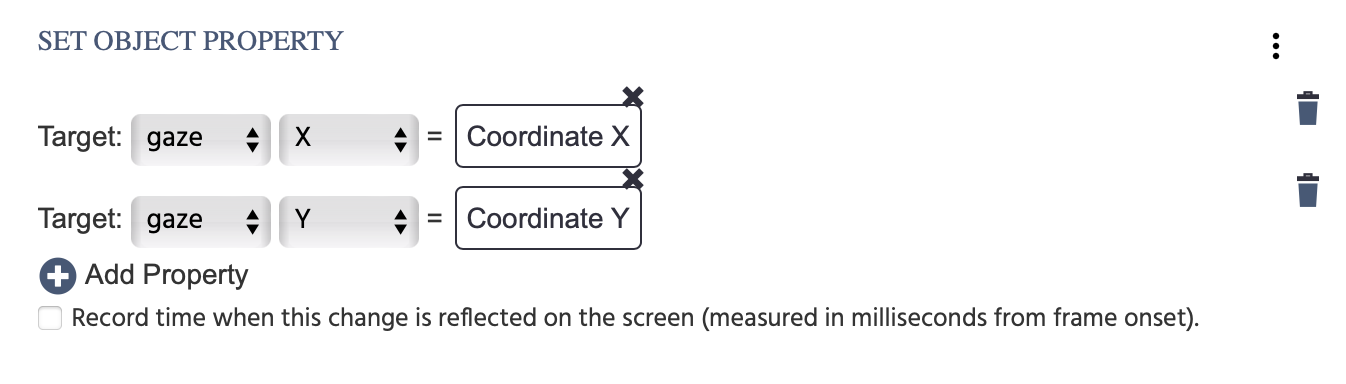
NOTE: the options for Coordinate X and Coordinate Y are selected from the trigger-specific (Eyetracking Gaze) menu.
Event 2: AOI Gaze Data
In this event, we want to set up the events such that:
- gaze is also recorded when the gaze is specifically set on the target AOIs (ie. the SVG objects we have uploaded)
- the specific SVG node data of the AOI is reported
Trigger
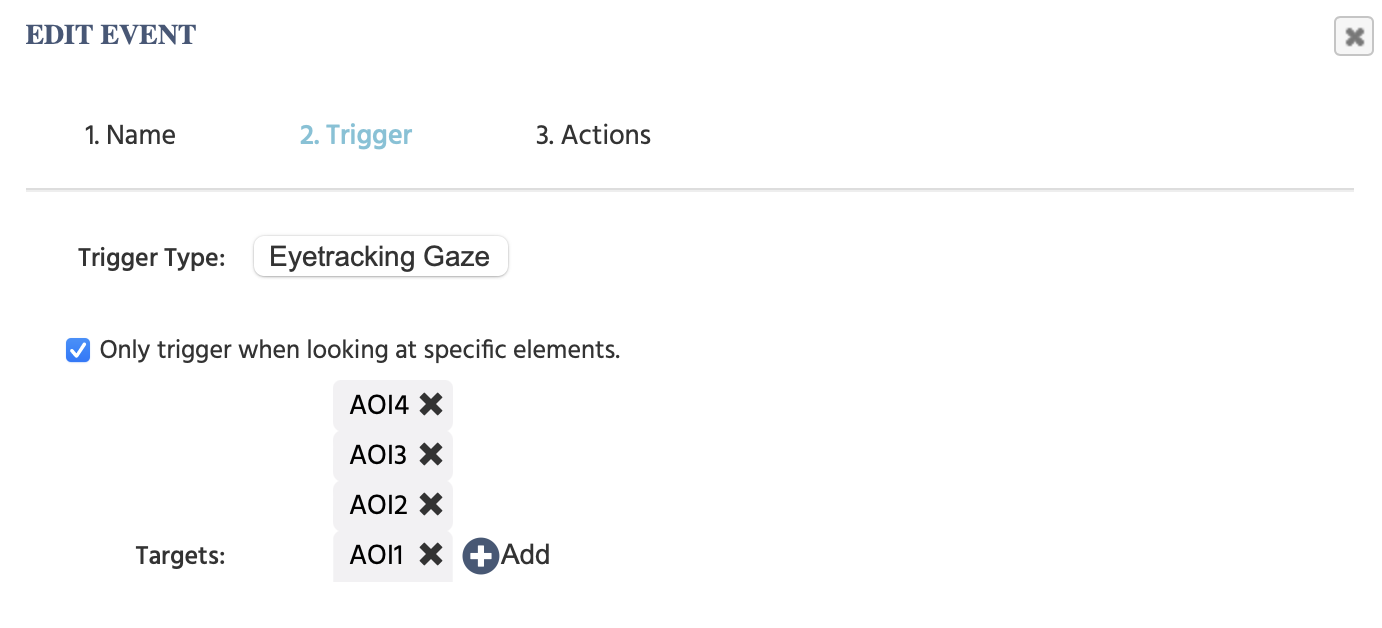
The Eyetracking Gaze trigger is also used as the trigger here. But in this context, we indicate that we are only interested in specific elements by clicking the respective option and then selecting the 4 SVG objects which are acting as Areas of Interest (AOIs).
Action
To set the call on each AOI, we need a Control Action → Requirement Action (If…Then). Essentially we want Labvanced to do the following…. “If the participant is gazing at AOI1, then we want to record the specific data for it in a specific variable, as well as the SVG path of that gaze”
First we click on the + Requirement button and the two pen icon values will appear.
- First pen icon: For the first field we select, from the trigger-specific (Eyetracking Gaze) menu, the
Stimulus Nameoption which uses the object name of the stimulus that the trigger (in this case gaze) was on. - Second pen icon: Select
Constant Valueand then select theStringoption and type in the object name (ie. AOI1):
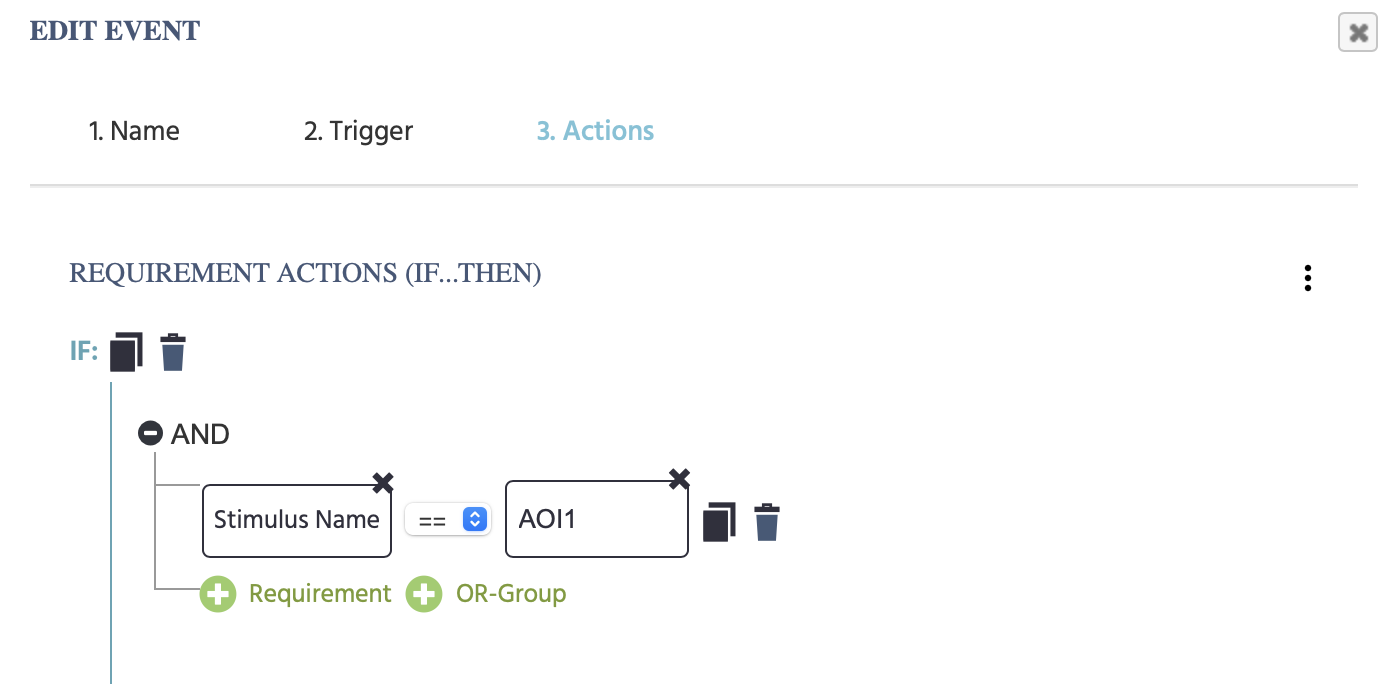
So up to this point we have established that when the trigger (gaze) is on the stimulus named AOI1... then:
- The variable
AOI_gaze_datathat we created earlier will record the [X,Y,T,C] array. - Also the
SVG1_pathvariable will be recorded to contain theStimulus Infowhich, in this case, since target of interest (AOI1) is an SVG, the stimulus info will contain the nodes of the SVG.
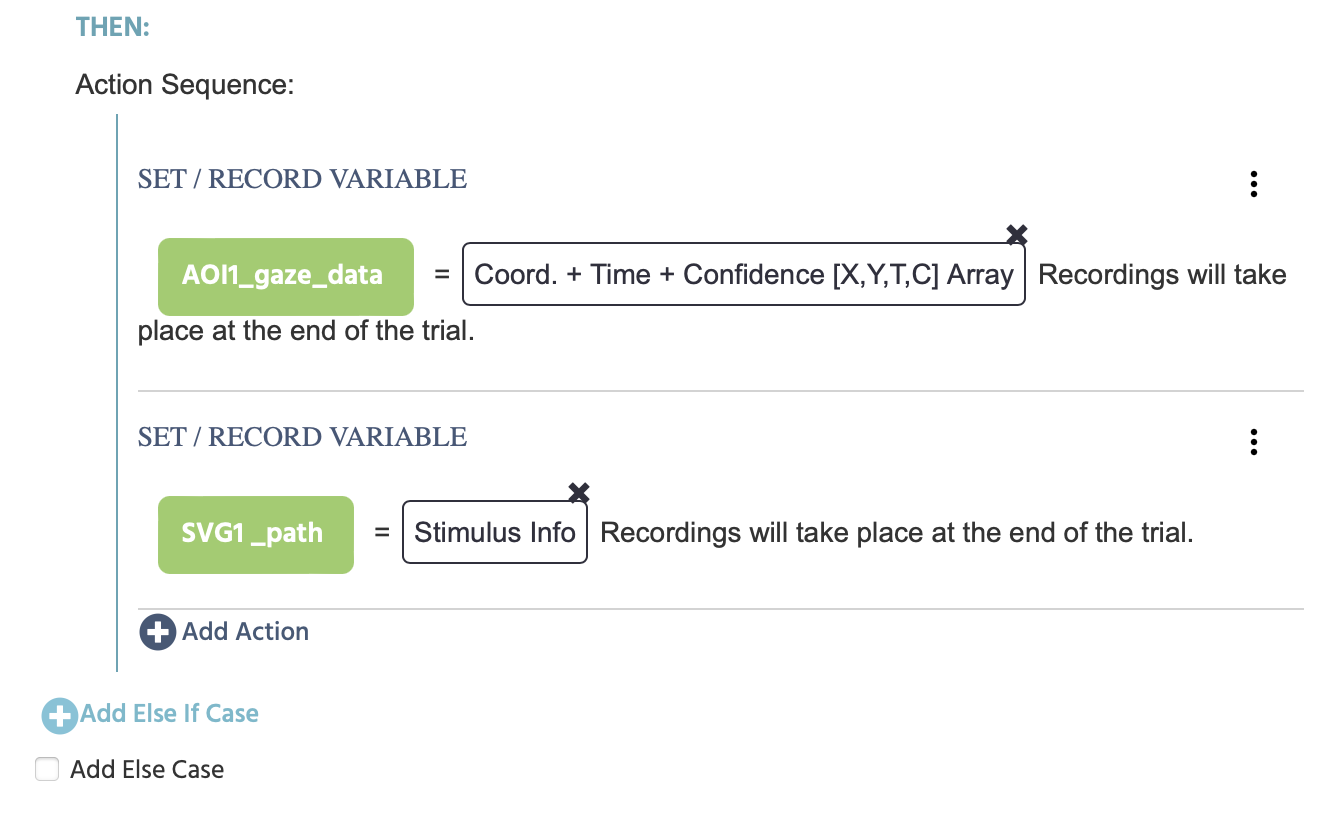
To specify the next AOI, the +Add Else If Case button in the dialog box and and then just repeat the structure / set up as it was shown above but with the main differences being setting the Stimulus Name as AOI2 and then also call the specific variables for storing the data, ie. AOI2_gaze_data and SVG2_Path as shown below:

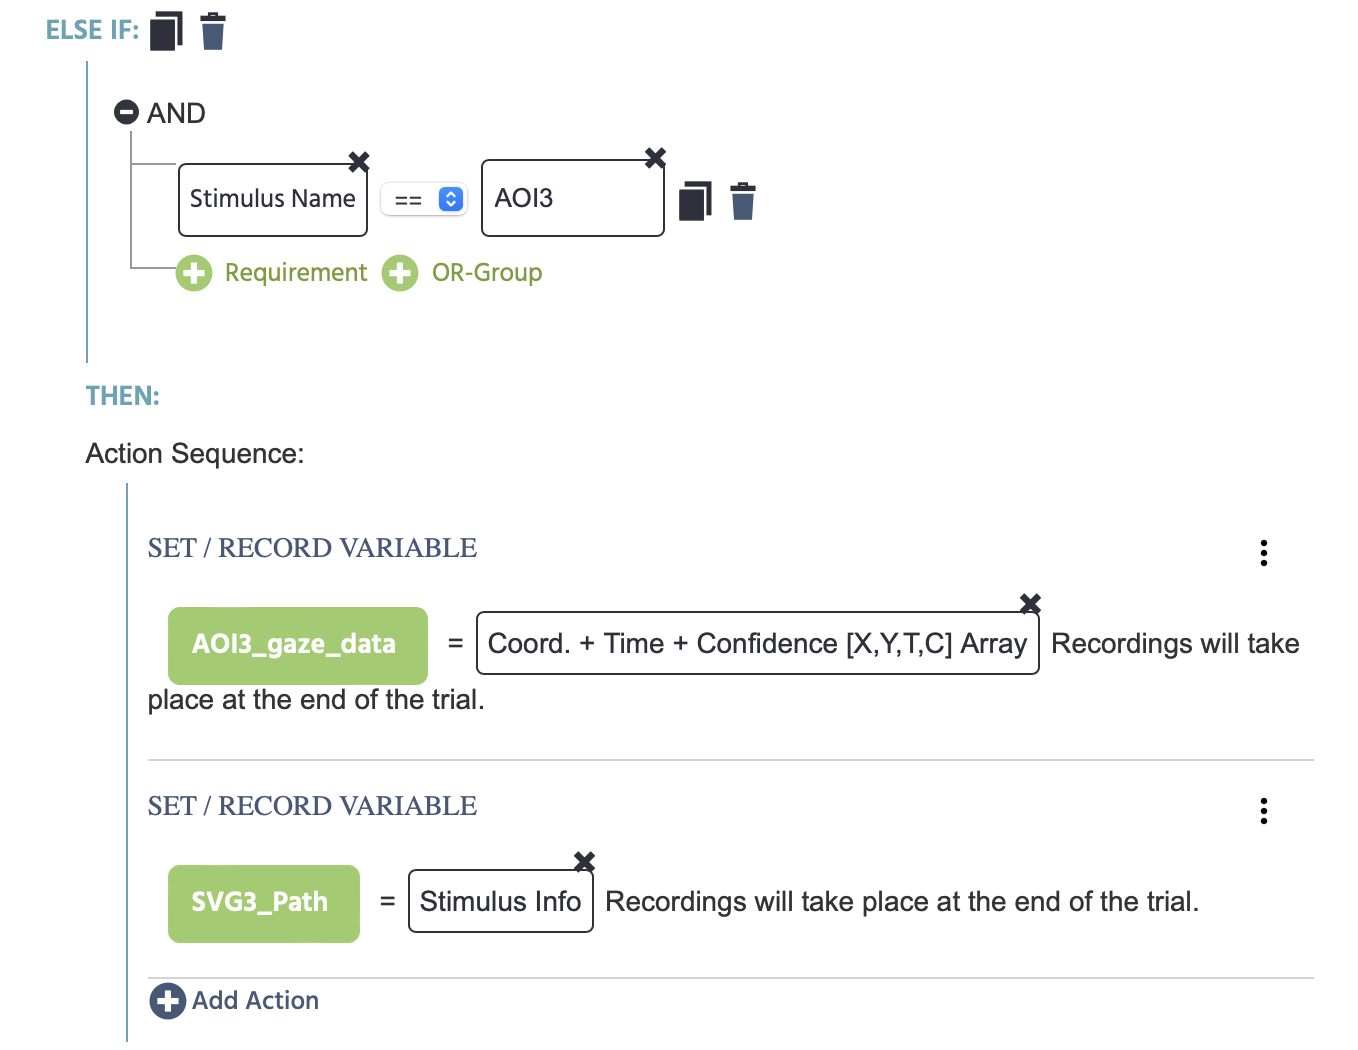
Next, for AOI3, we choose to Add Else If Case again and follow the same structure but with the custom variables we have created to store the data for this specific AOI:
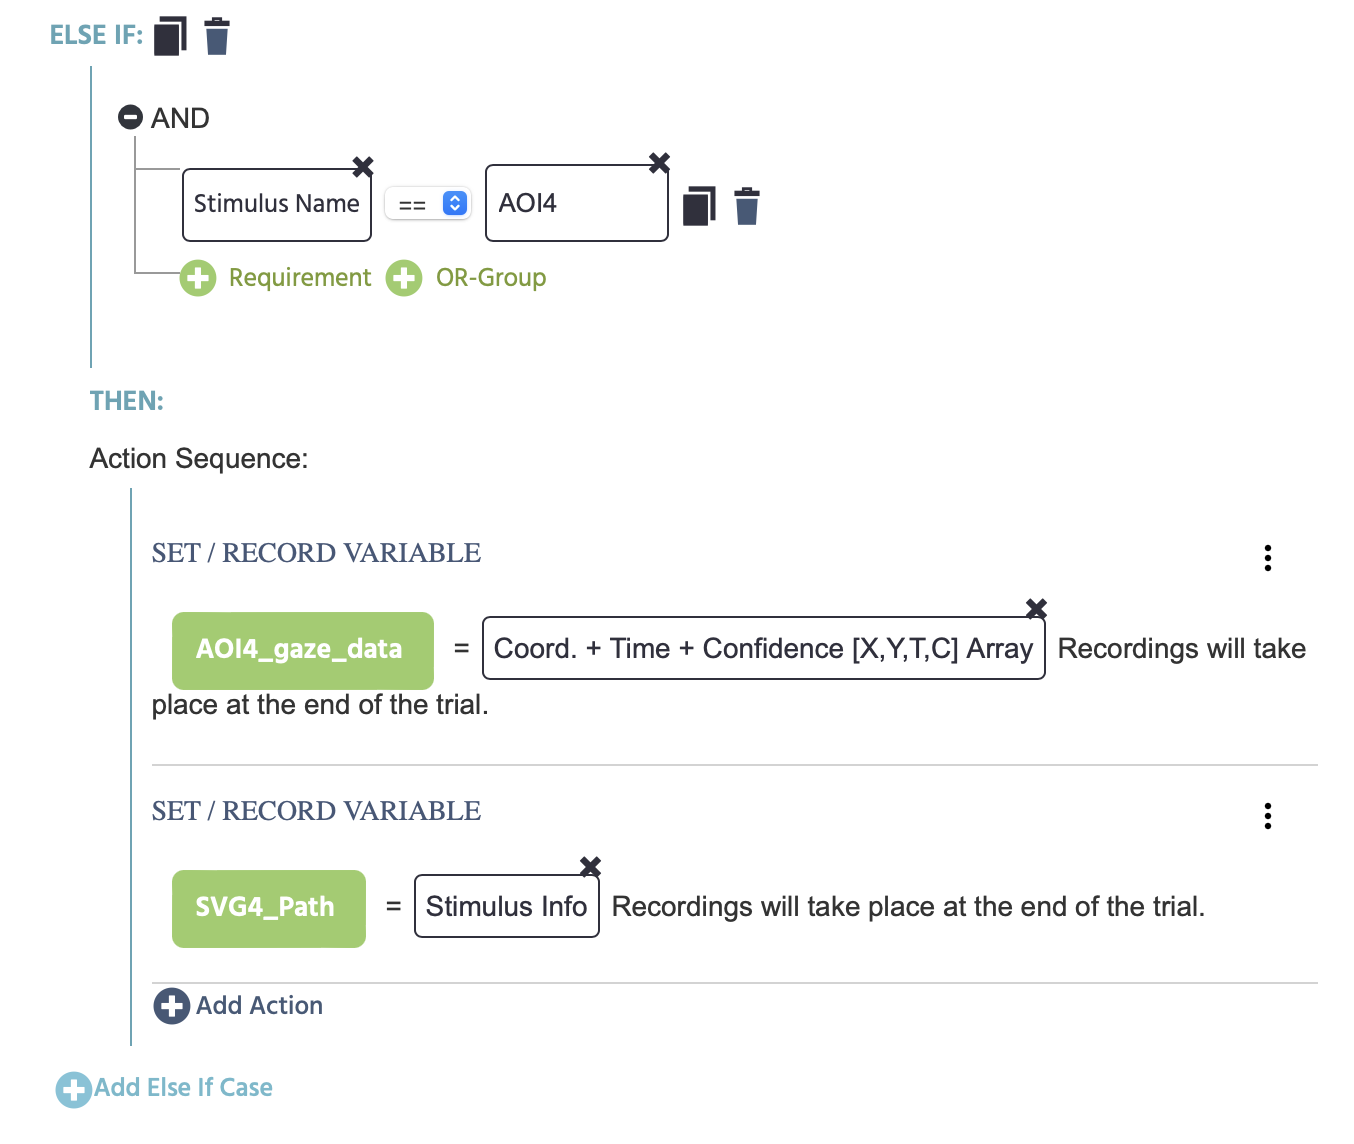
Again, for AOI4, we choose to Add Else If Case again and follow the same structure but with the custom variables we have created to store the data for this specific AOI:
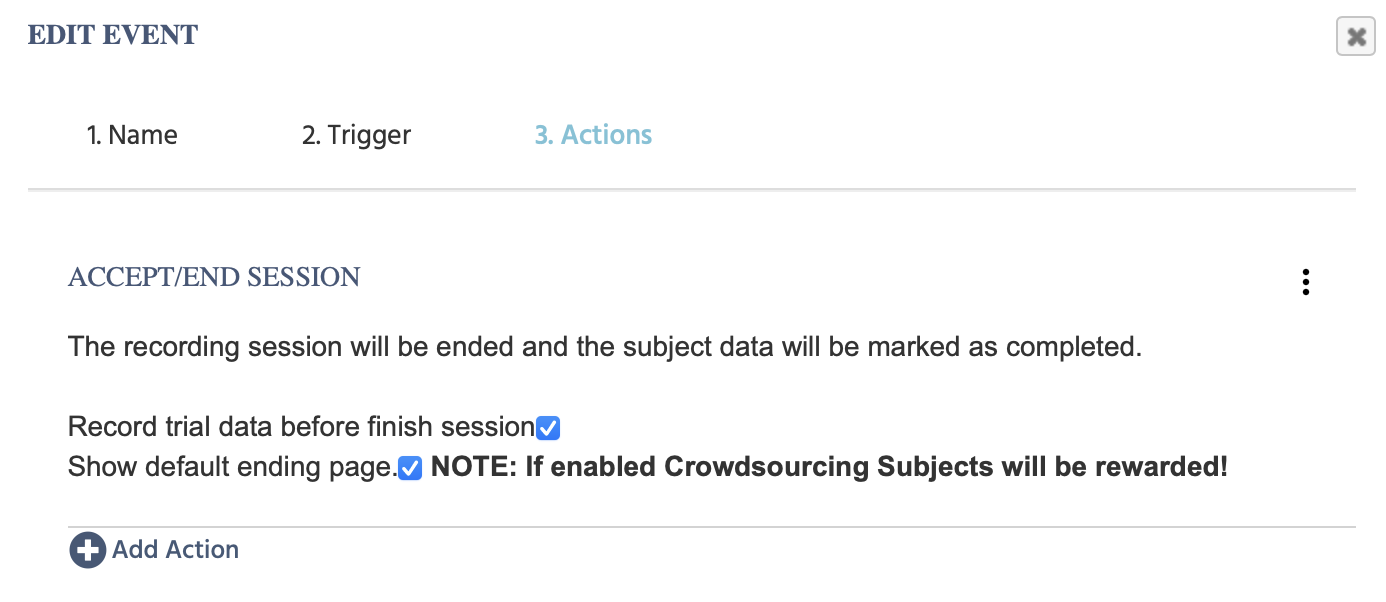
Event 3: Finish Experiment / Save Data
Lastly, for the data to be recorded and stored, we need to choose the Jump Action to Accept / End Session action once the Finish button is clicked on (which is the trigger), as shown below.
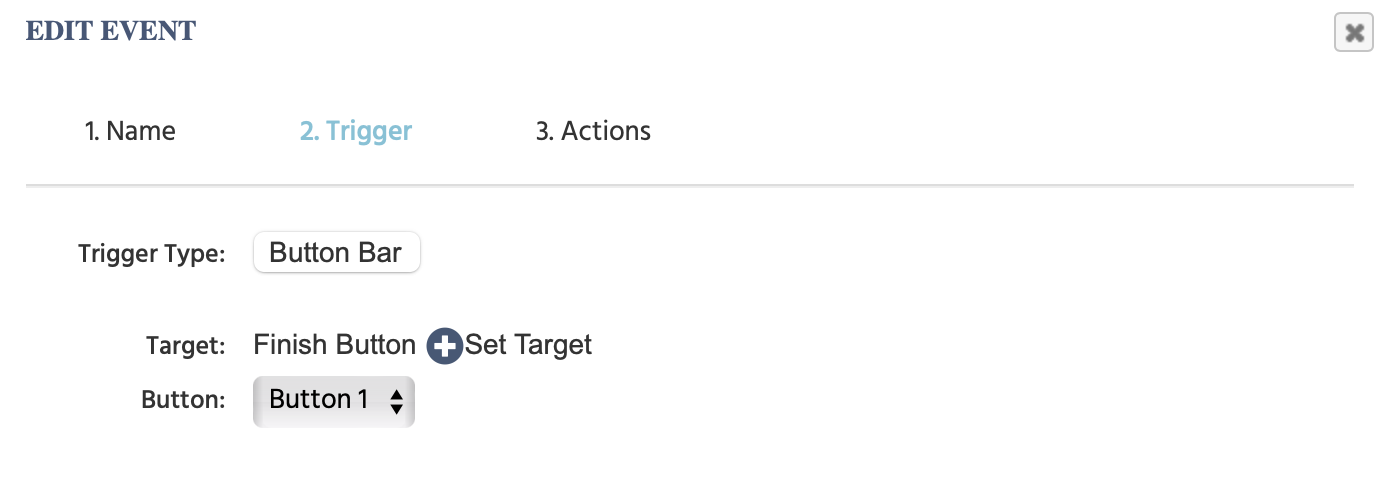
Trigger
The trigger is specified to occur when the ‘Finish Button’ is used:
Action
The action that will occur is that the session will be accepted which, as a result, means that the data will be recorded.
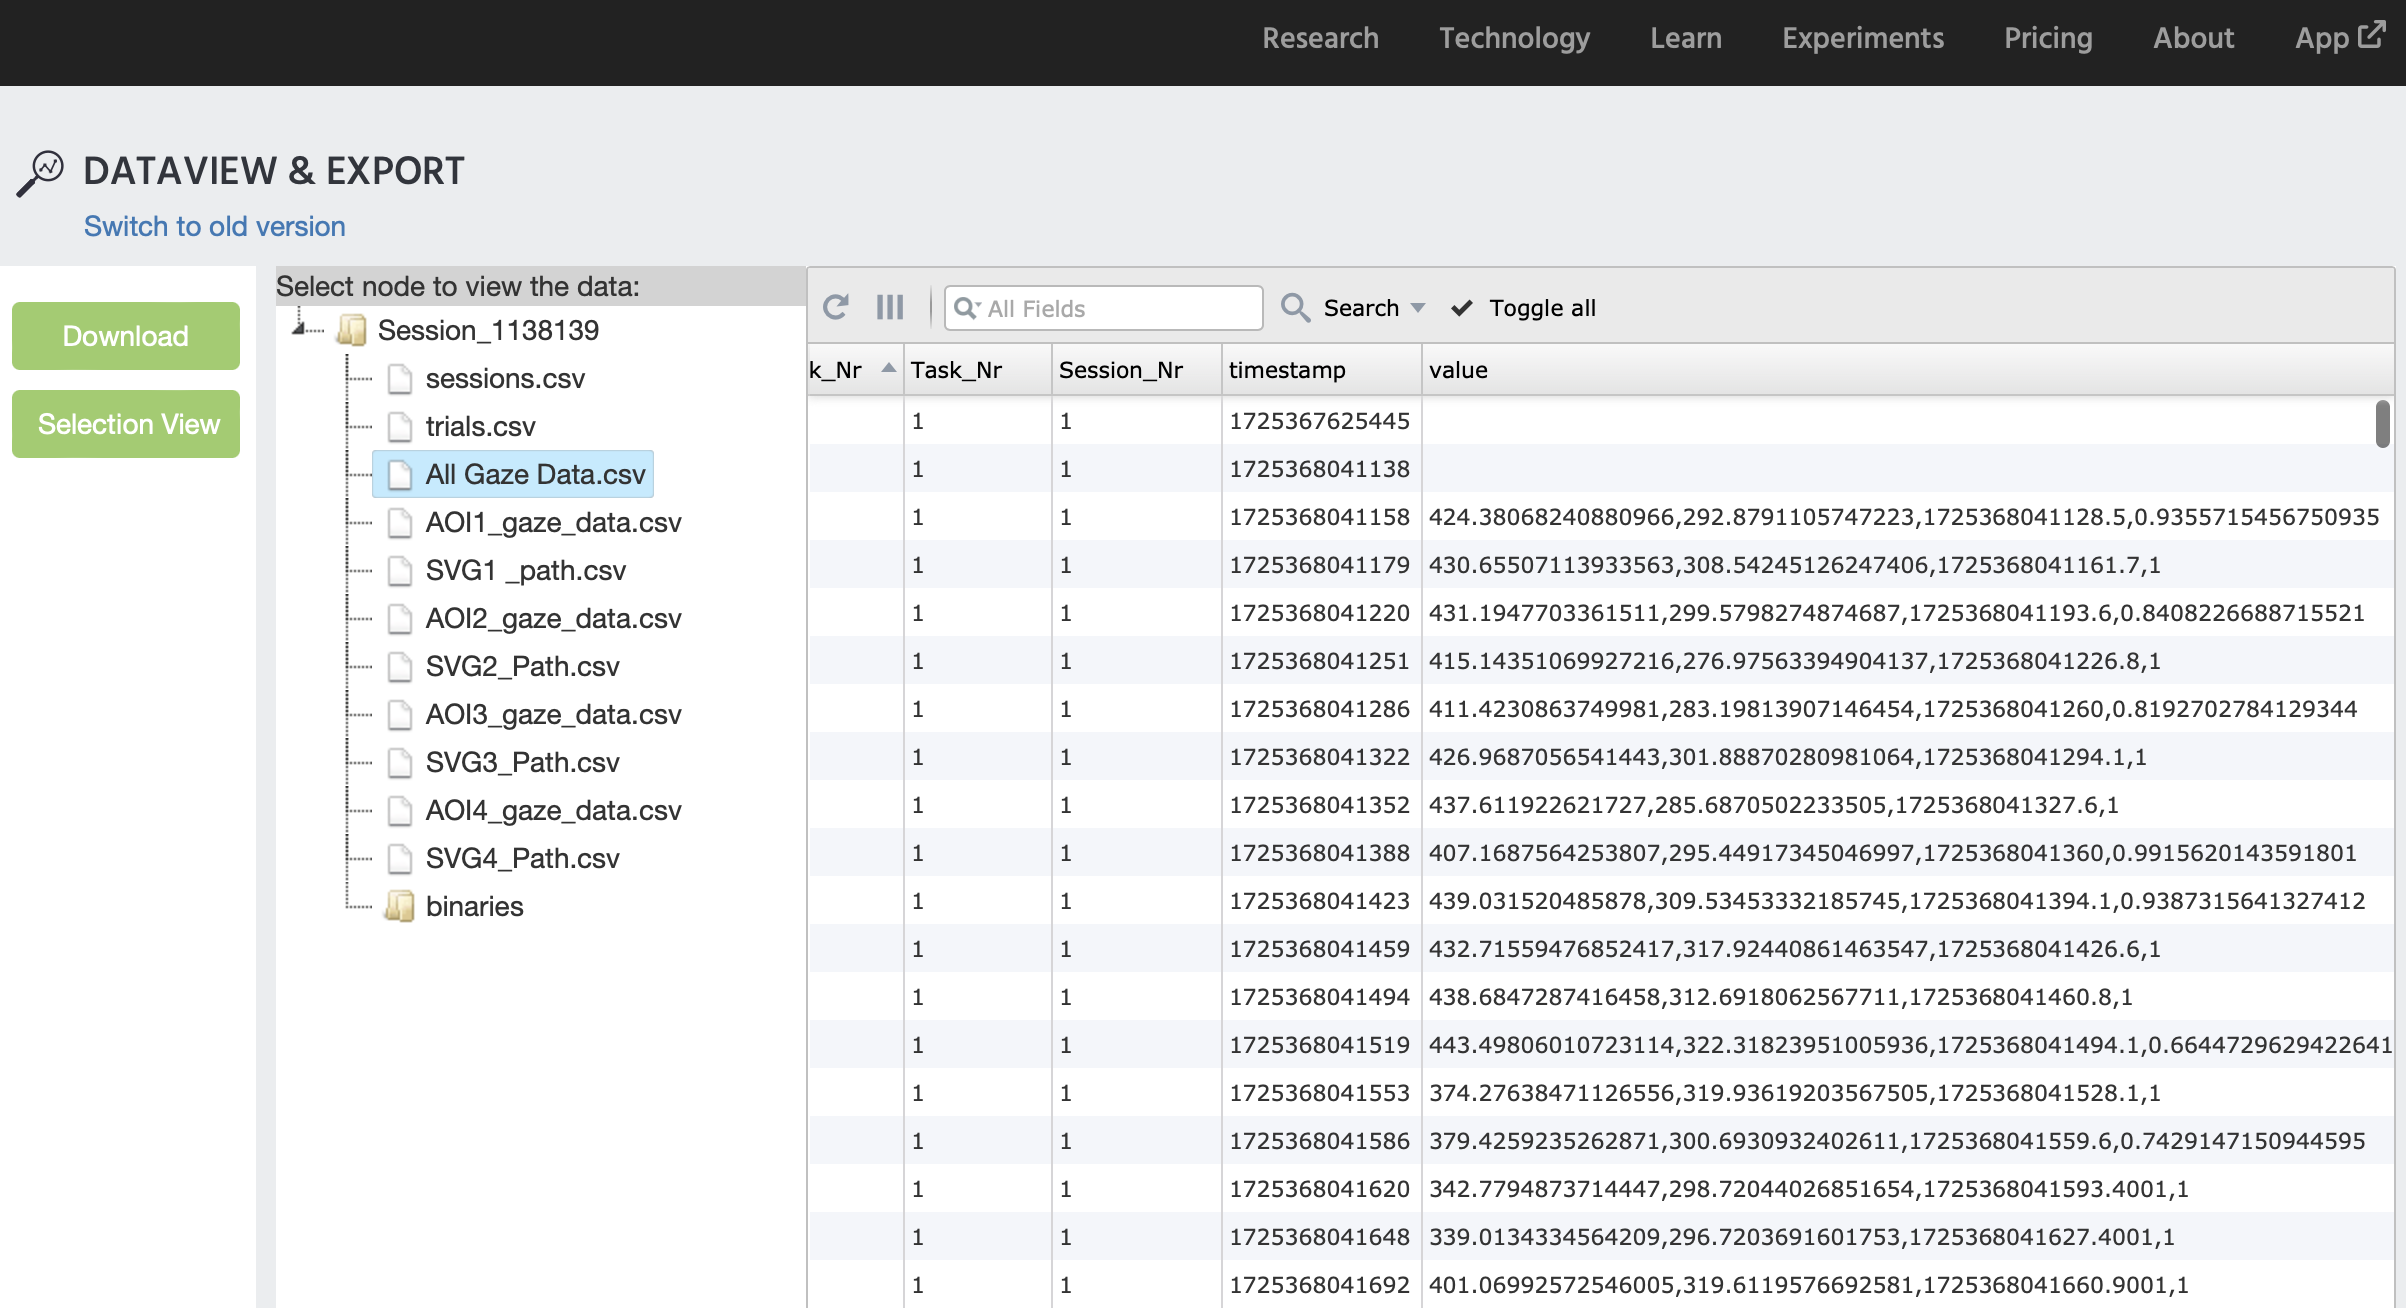
Data Recorded
The data recorded includes all of the custom variables plus experiment-specific values like the task number, the session number, etc.
In the example below, the Dataview & Export tab shows what the data looks like when it is separated by time series files. Each time series variable (ie. the variables that record all changes) is shown with its own CSV file on the left-panel below. This can be accomplished by specifying the relevant setting utilizing the Export Format settings.
When the All Gaze Data.csv is selected, numerous variables are recorded including those shown below. The ‘value’ column captures the [X,Y,T,C] array where the values are separated by commas:
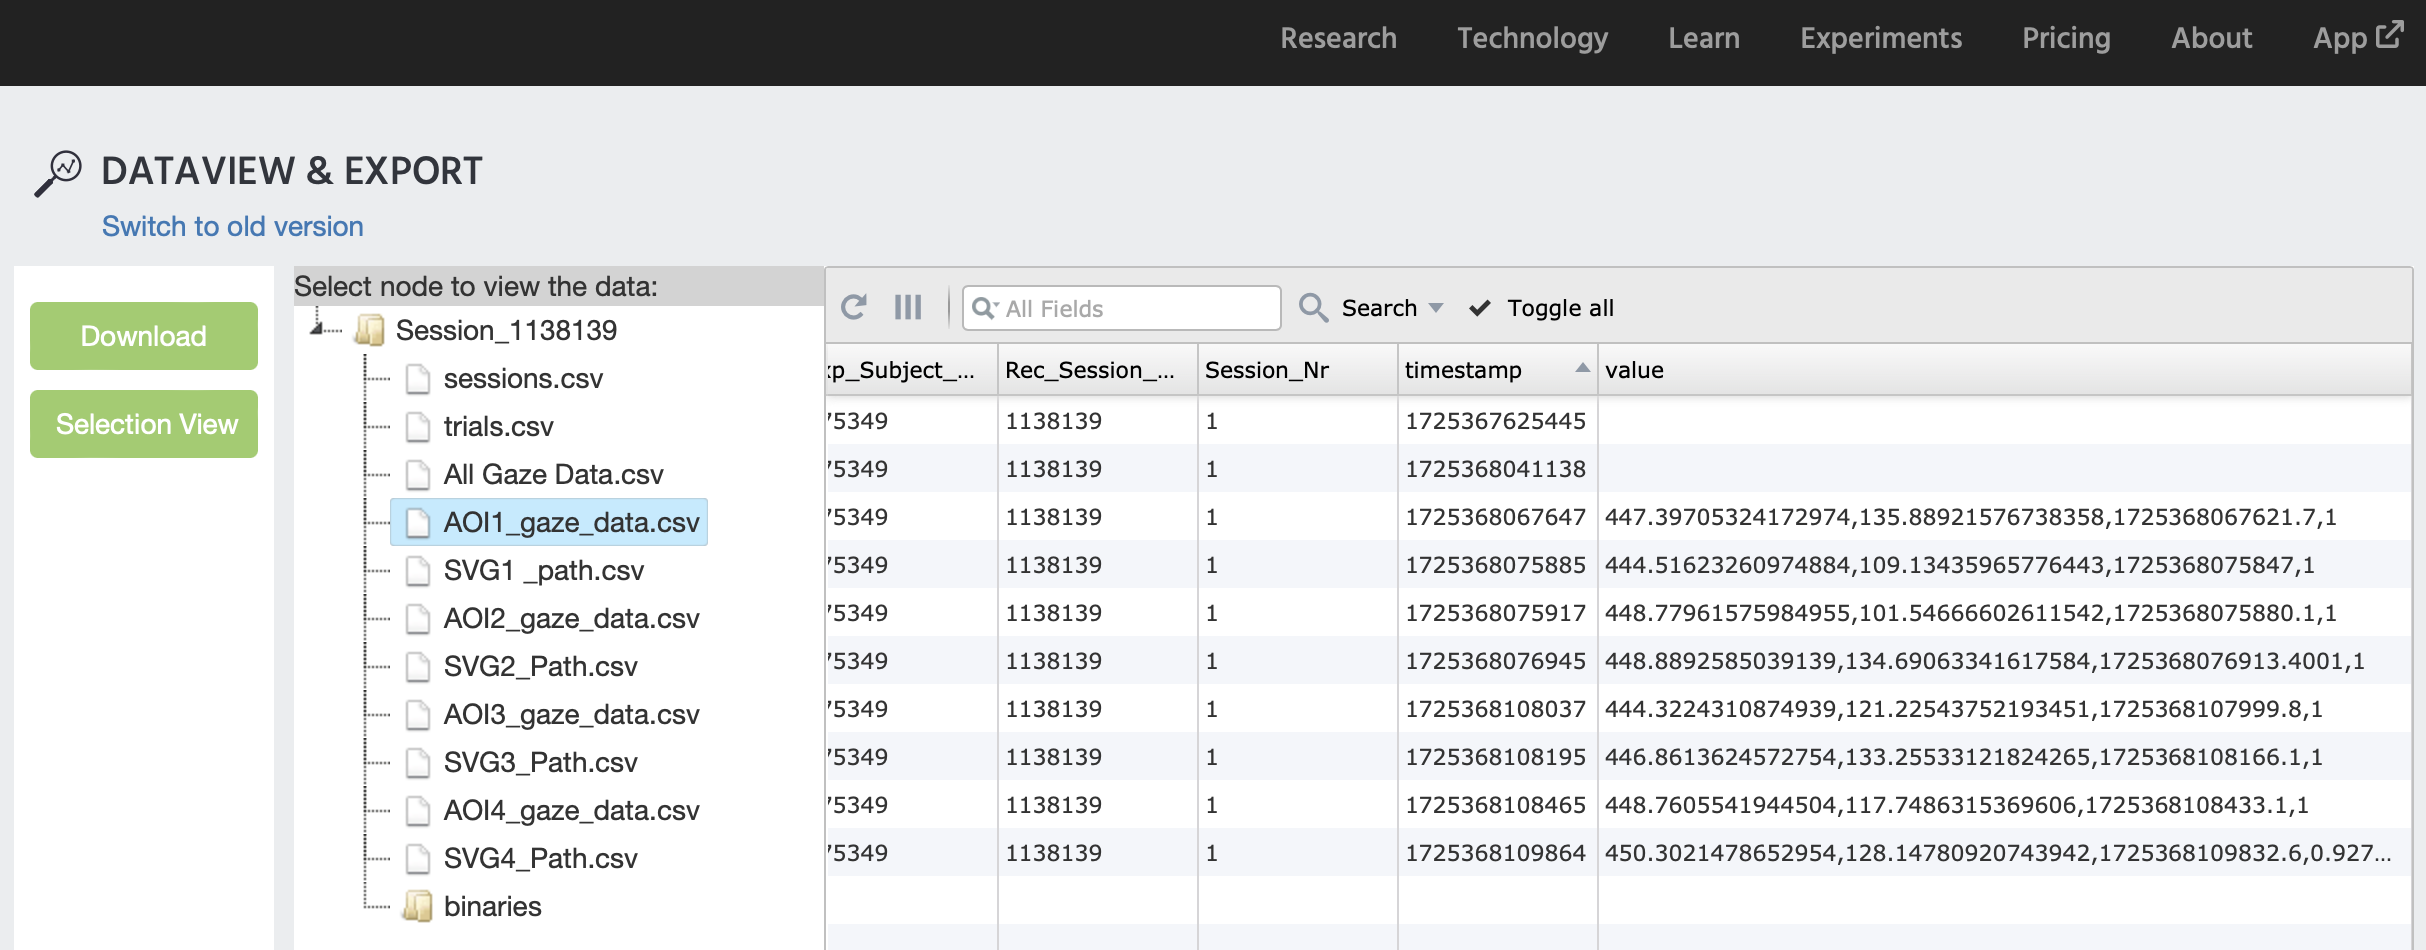
The image below shows a preview of the arrays that were recorded specifically when the gaze was on AOI1, as shown by the ‘value’ column:
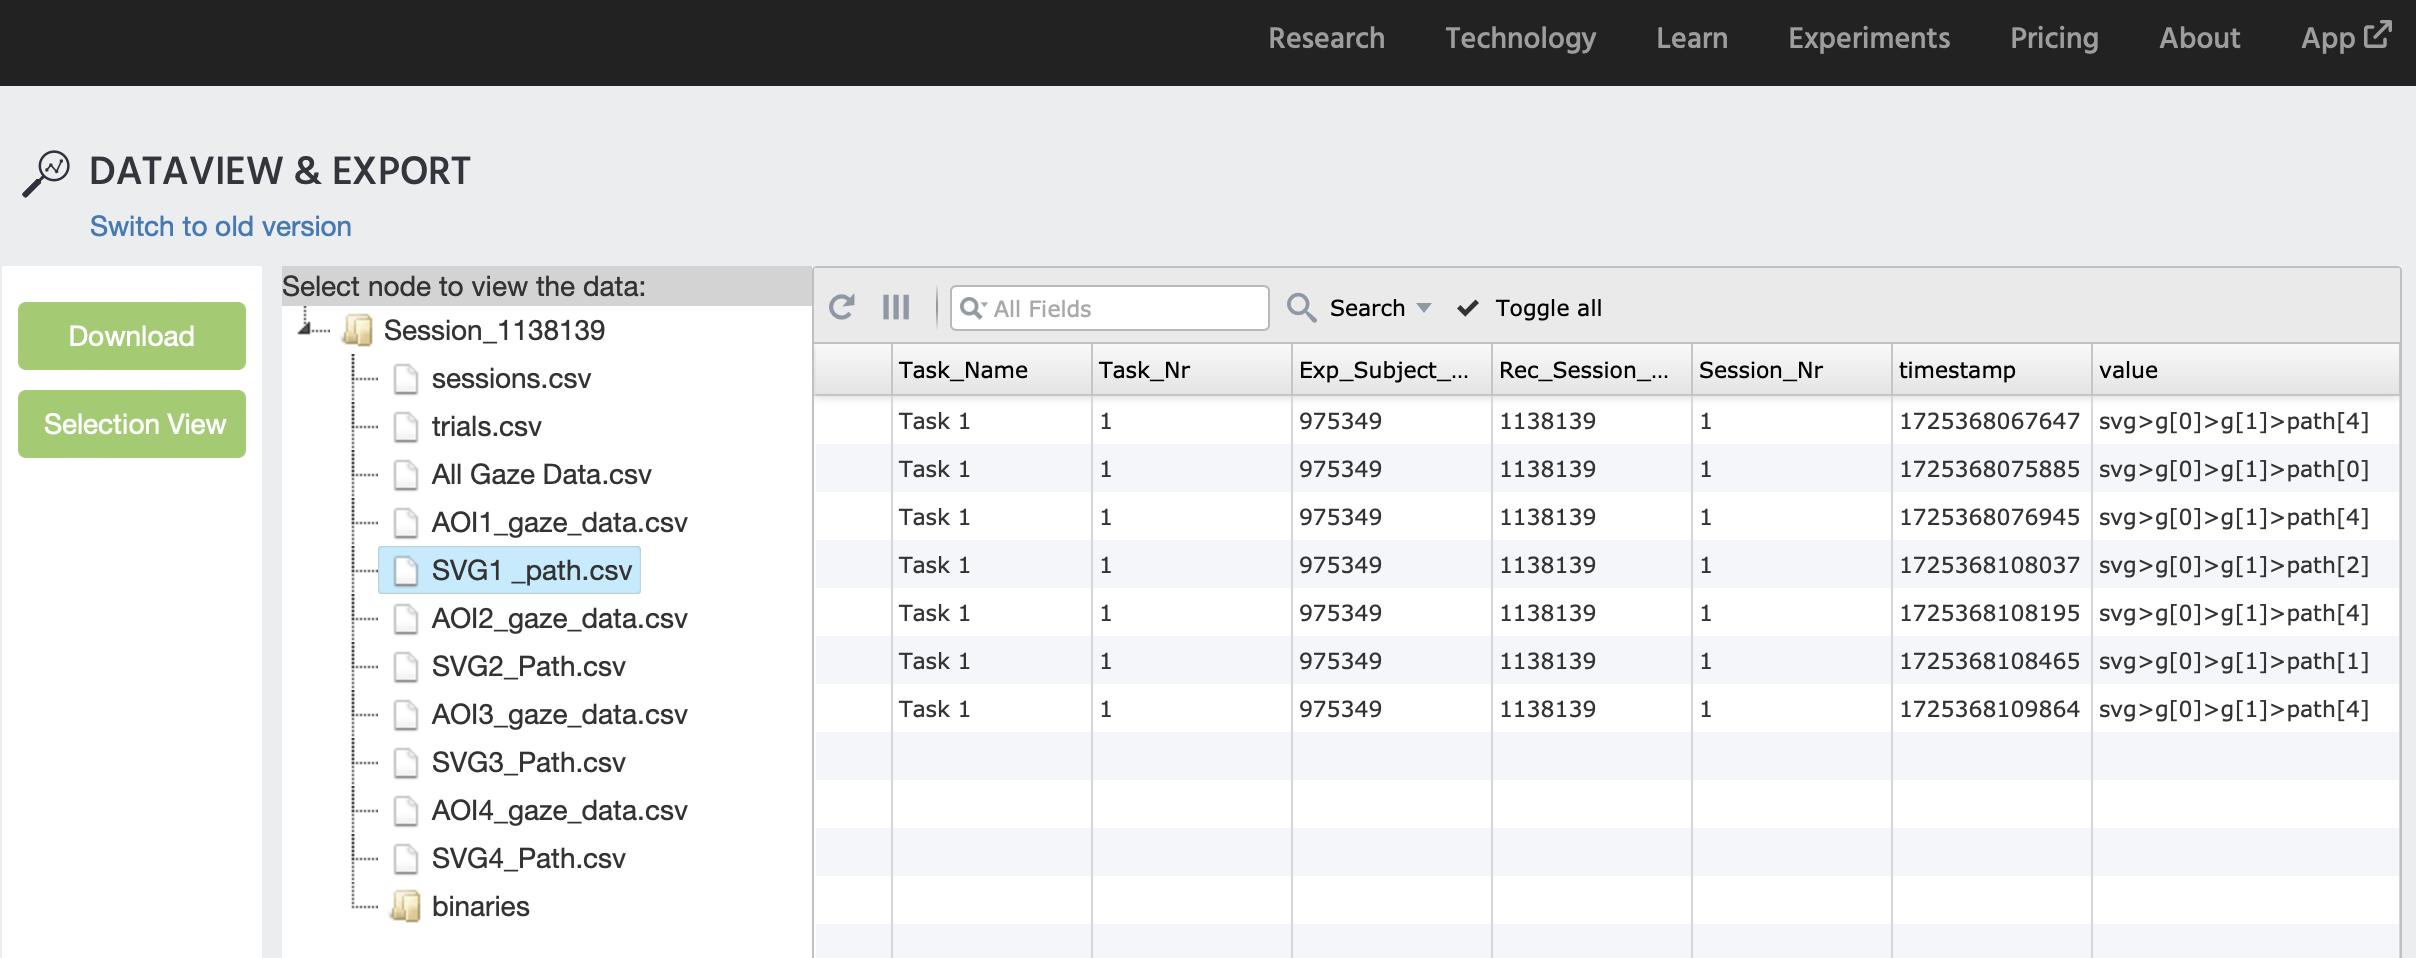
The image below shows a preview of the SVG paths that were recorded specifically when the gaze was on AOI1, as shown by the ‘value’ column:
Conclusion
This demo aims to show how to record gaze data and utilize SVG objects to record gaze specifically in the context of when gaze occurs on an Area of Interest (AOI).
If you have any questions, please reach out to us and let us know about the details of your experiment, especially if you need to conduct a feasibility check!