The Participants Tab
With Labvanced, you can manage and communicate with the participants in your study via the ‘Participants’ tab. The ‘Participants’ tab is where you can have an overview of your subjects for a specific study, customize the emails that are being sent during the course of the published study, as well as connect your email address using the SMTP Server. Essentially, you can use this tab to manage communication with your study participants taking part in your research which is especially useful for longitudinal research with multiple sessions.
The ‘Subjects’ Panel
The ‘Subjects’ panel is essentially a table where the participants / subjects of your study are listed. Here, you can add subjects with a bulk import (if you have a list prepared), manually (one-by-one), access group statistics, invite new subjects, as well as edit and discard subjects, if needed.
Note: Manually adding participants is only available to lab license holders.
Options for the ‘Subjects’ Side Panel
On the left side of the table, there are several buttons that you can utilize to manage the study participants taking part in your research experiment:
| Option | Description |
|---|---|
Bulk Add Subjects | This option allows you to upload a CSV file with multiple participants. You need to indicate their email address, the subject code (can be a mix of alphanumeric characters) and the group number they should be assigned to. The 'Mask Emails' option is a setting that allows the study owner to never see the subjects' emails after adding them in the Participants tab. Even if the emails are added from a CSV, our interface will never show the study owner the email addresses. This setting is relevant for GDPR protocols. |
Add Subject | Here, you can manually add a single participant by filling out the following fields in the dialog box that appears: email address, subject code, and group. |
Group Statistics | This button will open a dialog box that gives you an overview of the group statistics and the participation summary. Here, you can find how many subjects have been assigned to your groups, how many have been discarded (automatically due to timeout or manually), the group weights and more. Please note that group settings and randomization are controlled and set under the ‘Study Design’ tab. |
Invite New Subjects | When there are newly added participants, clicking this button automatically sends all of them the ‘Invitation’ email from the ‘Emails’ Panel. If you want to invite only certain participants, then you have to select them using the checkbox found on the table (the first column). Please note that in order for the ‘Invitation’ to be sent out, an SMTP configuration must be set up before you can send emails. |
Edit | Using this button, you can edit specific fields associated with the participant, such as the Subject Code, the Subject email, and the Group they are assigned to. If you have ‘Auto’ selected, then they will automatically be assigned to a group. If you have a specific Group selected, then the ‘Last Session Nr’ field will appear. |
Discard Selected | Allows you to discard a subject. Please note that since deleting a participant from these records is permanent and cannot be undone, we only allow one participant to be discarded at a time in order to minimize any mistakes. |
Column Values of the ‘Subjects’ Table
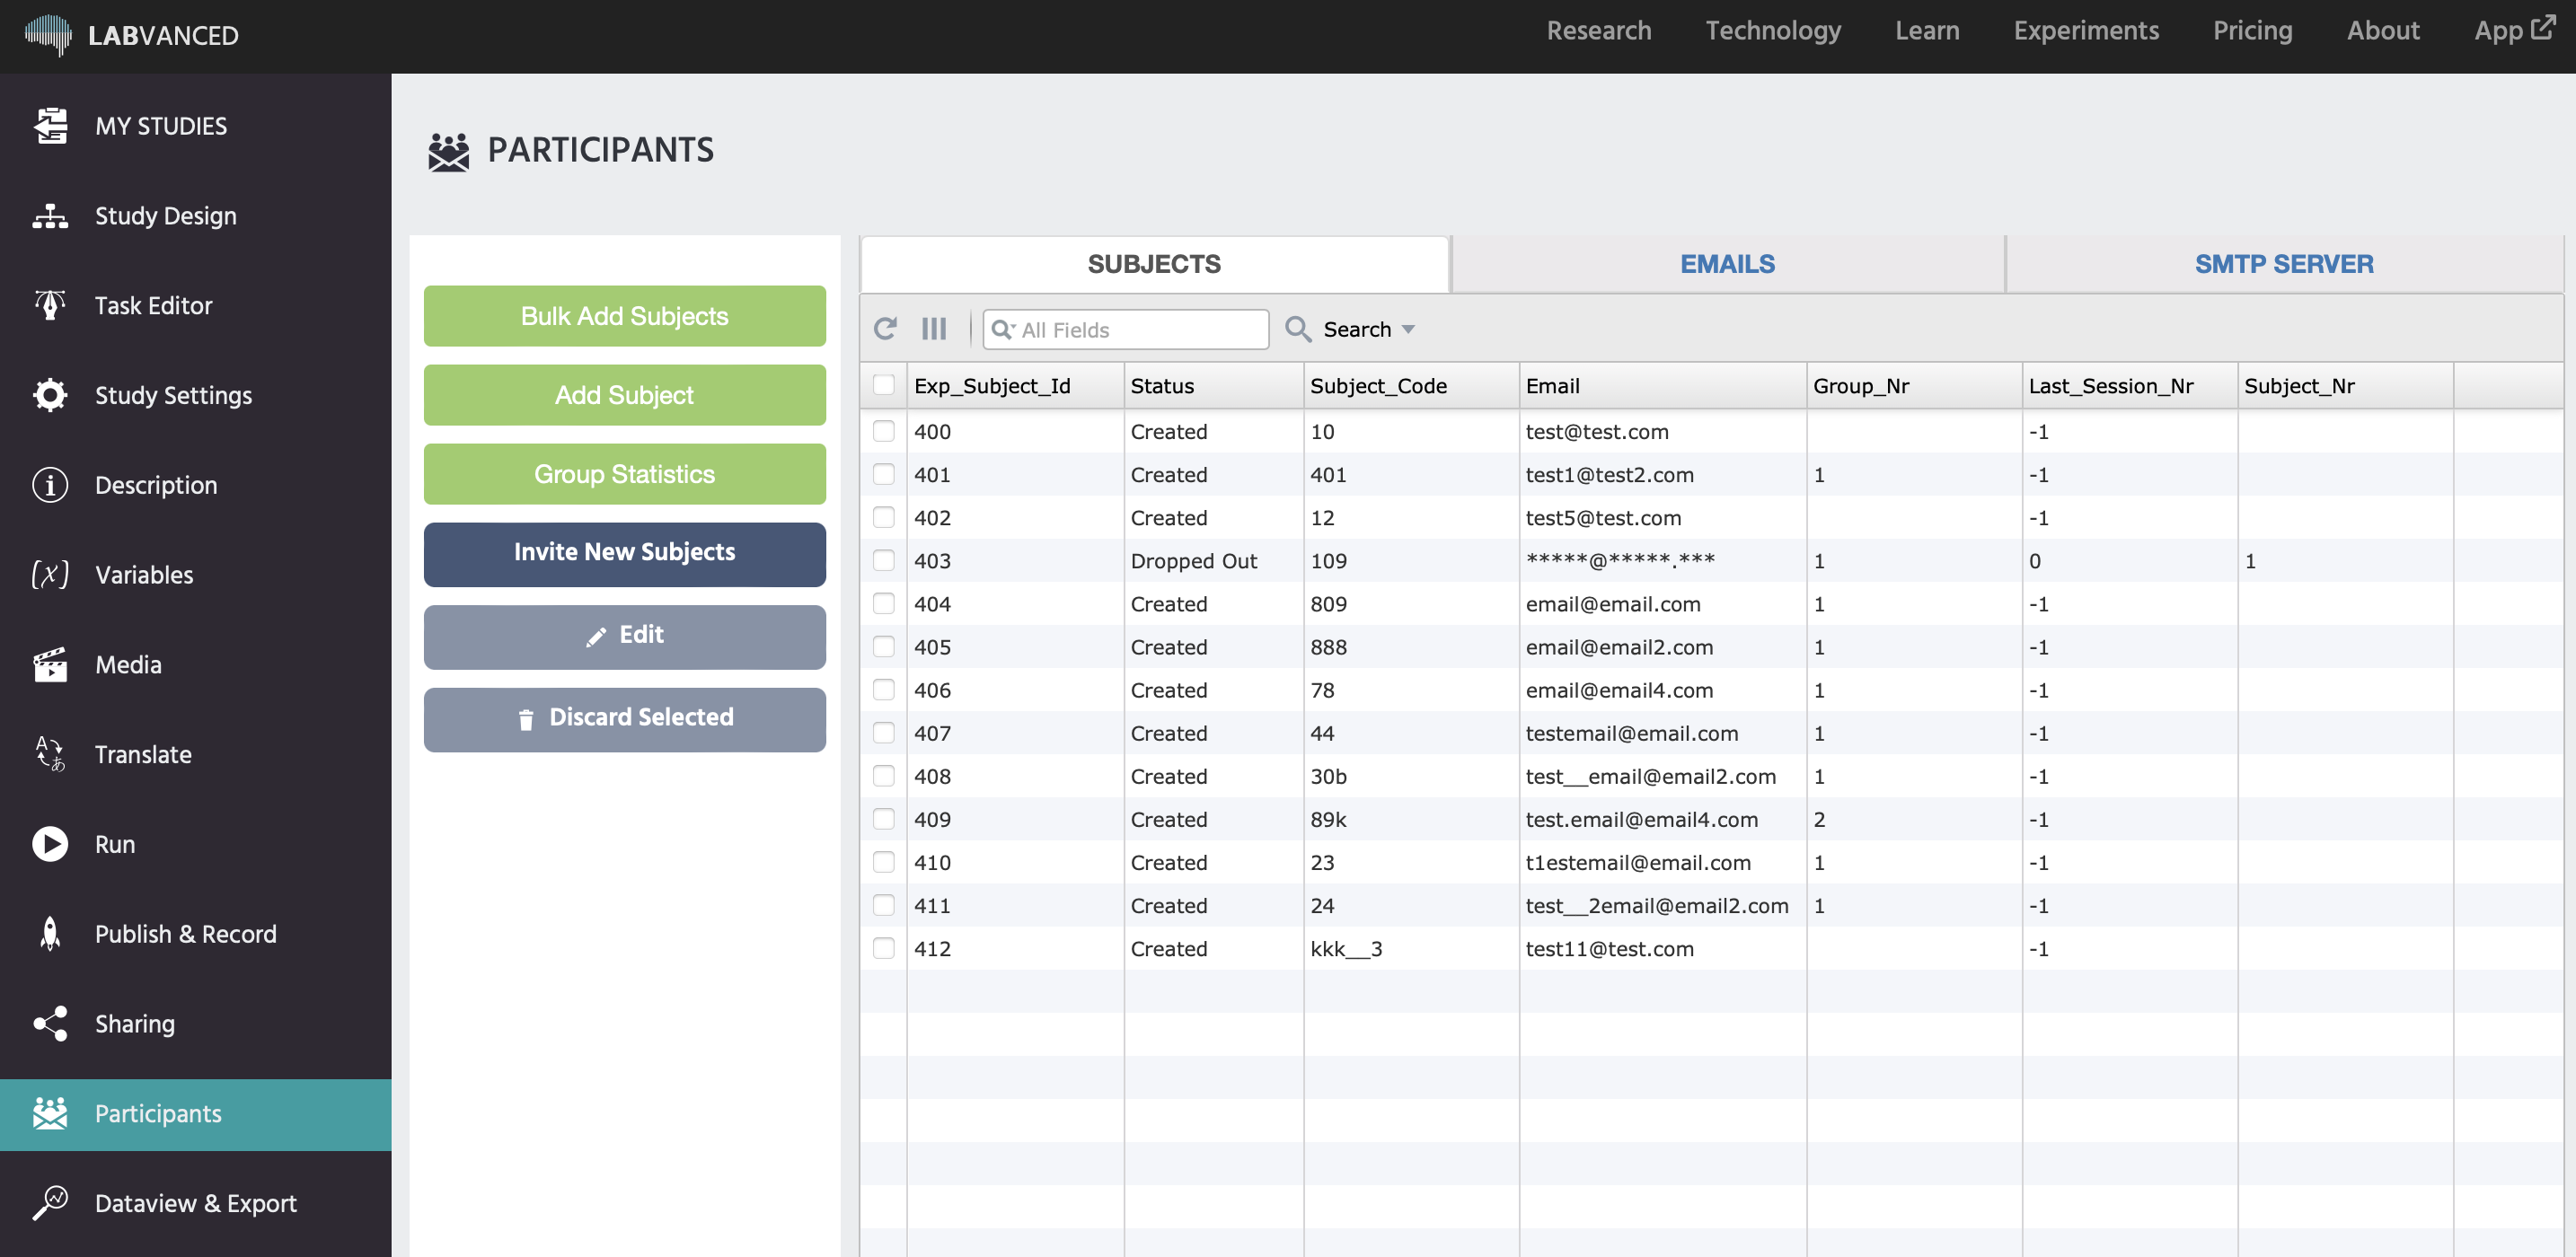
When the ‘Subjects’ Panel is open, the table (shown below) is prominent as it is where all the participants are listed. Using this table, you can also perform actions described previously, like inviting participants, editing, as well as discarding selected participants.

This table also gives you an overview of key parameters and participant information by listing the following:
| Column Value | Description |
|---|---|
Exp_Subject_Id | The experiment subject id is listed under this column, a number that is automatically assigned. |
Status | This column shows the participants status for the experiment. If they are ‘active’ it means that they have participated in the study. If the status is ‘created’ then it means that they have been added to the list here but have not actually taken part in the experiment. |
Subject_Code | Subject code is the unique identifier that you have assigned to the participant upon adding them to the subject panel. The subject code can be a combination of alphanumeric values and even special characters like underscores. |
Email | The participant’s email address. This field is important because this is where they will receive study related information, like reminder emails. |
Group_Nr | A numeric value that refers to the group number that the participant belongs to. If this value is blank, it means that they will automatically be assigned to a group. |
Last_Session_Nr | Indicates the last session that the user has completed. In the case of -1, the user has only been created and has not started any sessions. In the case of 0, the user has started but has not completed the first session. |
Subject_Nr | A sequential value that increases in a stepwise fashion once a participant accesses the experiment. |
Subject_Nr_Per_Group | Same as above, but is specific to the group they are assigned to. |
Labvanced_Token | Labvanced token is a unique identifier that our system assigns to each subject. |
Crowdsourcing_Subj_Id | The subject's crowdsourcing ID, if applicable. |
Next_Session_Due | A datetime value of when the next session will be available to a subject. |
Next_Session_Expiry | A datetime value of when the next session will close or end / expire for a participant. |
Last_Email_Type_Sent | Indicates the last email that was sent to the participant. |
Next_Email_To_Send | Indicates what the next email is that will be sent to the participant. |
The ‘Emails’ Panel
Under the ‘Emails’ panel, you will see four standard email templates that you can modify before they are sent out, as well as dynamic parameters (on the left-hand panel) that you can readily use in your text.

Available Email Templates
Under the ‘Emails’ Panel, there are four email templates that you can modify for communicating with the study participants taking part in your research:
- Invitation: This is the template of the email that you can manually send out to new participants.
- Session Reminder 1: Is sent out upon completing the session, notifying the participant when the next session will be available.
- Session Reminder 2: Once the next session has become available, this email is sent out.
- Final Reminder: The final reminder is sent out a few hours before a session expires to the participants that did not complete the session yet.
Note: Customizing emails is available only to lab license holders.
When editing emails, you can also use dynamic parameters. The existing email templates show you how these dynamic parameters are working, so you can refer to that for examples of how they can be used.
Dynamic Parameters Listed in the ‘Emails’ Side Panel
Dynamic Parameters are essentially variable values that are inserted in the email and will display a unique value associated with the subject taking part in the specific experiment. These are the available options:
| Dynamic Parameter | Description |
|---|---|
Last_Completed_Session_Nr | Indicates the last session that the user has completed. In the case of -1, the user has only been created and has not started any sessions. In the case of 0, the user has started but has not completed the first session. |
Reminder_Time | The datetime value of when the next reminder is scheduled for. |
Next_Start_Time | The datetime value of when the next session is available to start. |
Next_End_Time | The datetime value of when the next session is scheduled to close. |
Final_Reminder_Time | The datetime value of the final reminder for the session. v |
Name_Of_Study | The name of your study as defined under the ‘Description’ tab. |
Researcher_Email | Your email address. |
Link | The link to the experiment. |
Days_Left | How many days are left until the next session becomes available. |
Hours_Left | How many hours of a day are left until the next session becomes available. |
Minutes_Left | How many minutes of a day are left until the next session becomes available. |
Timing the Emails to be Sent Out to the Participants in Your Study
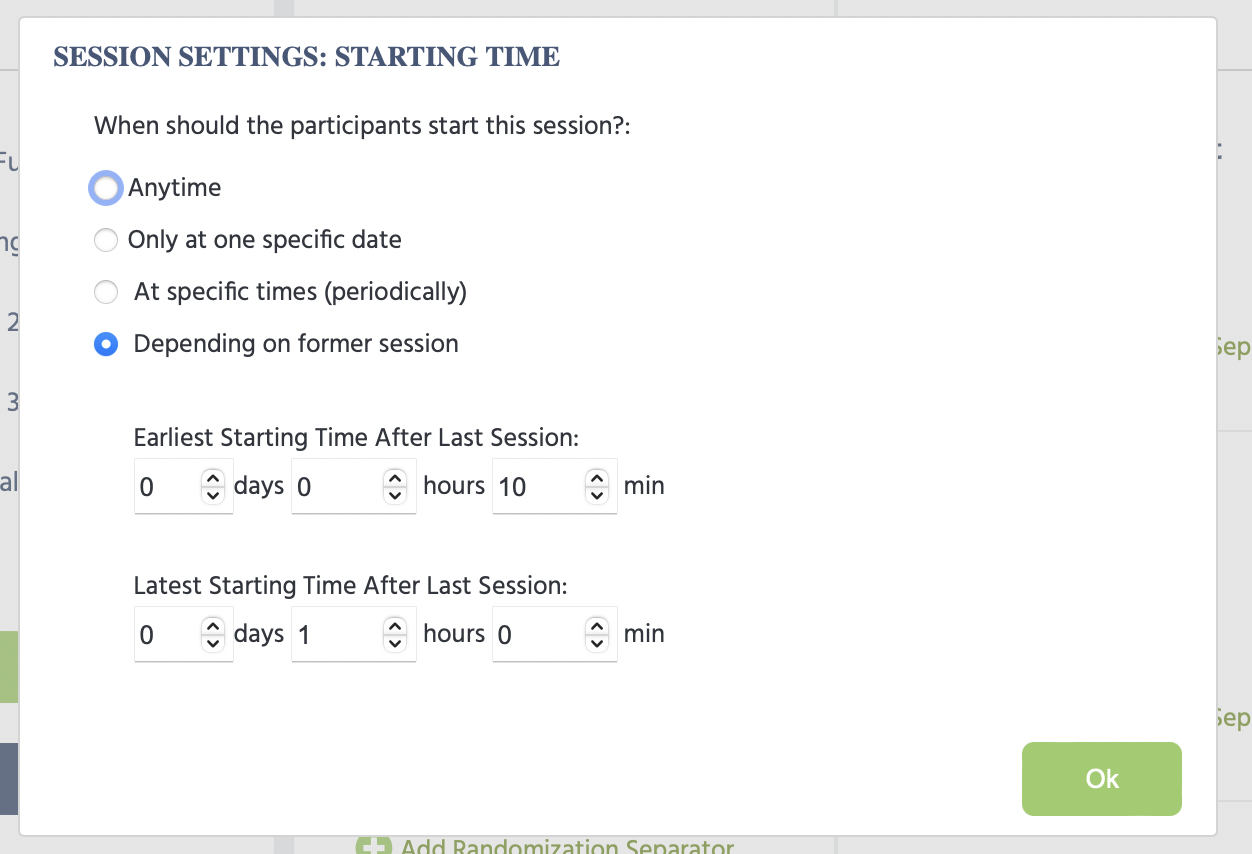
At this point, you may be wondering when emails are sent out. Besides the ‘Invitation’ email which you can control by clicking the ‘Invite New Subjects’ button under the ‘Subject Panel,’ the session emails are sent out based on the ‘start/end’ time parameters you set up per session under the Study Design tab.
Under the ‘Groups’ panel in the ‘Study Design’ tab, there is a clock icon where you can specify the start / end times per specific session. When clicking that clock icon, you can indicate when a specific session for an experimental group is available, as shown in the image below. Read more about session order and participation time settings here.
The ‘SMTP Server’ Panel
The ‘SMTP Server’ Panel is where you go to hook up your email address and establish a channel of communication between you and your participants. With the SMTP Server connection, the emails you made in the ‘Emails’ panel will be sent from your email address. It also allows participants to answer your emails and for their replies to come directly to your inbox.
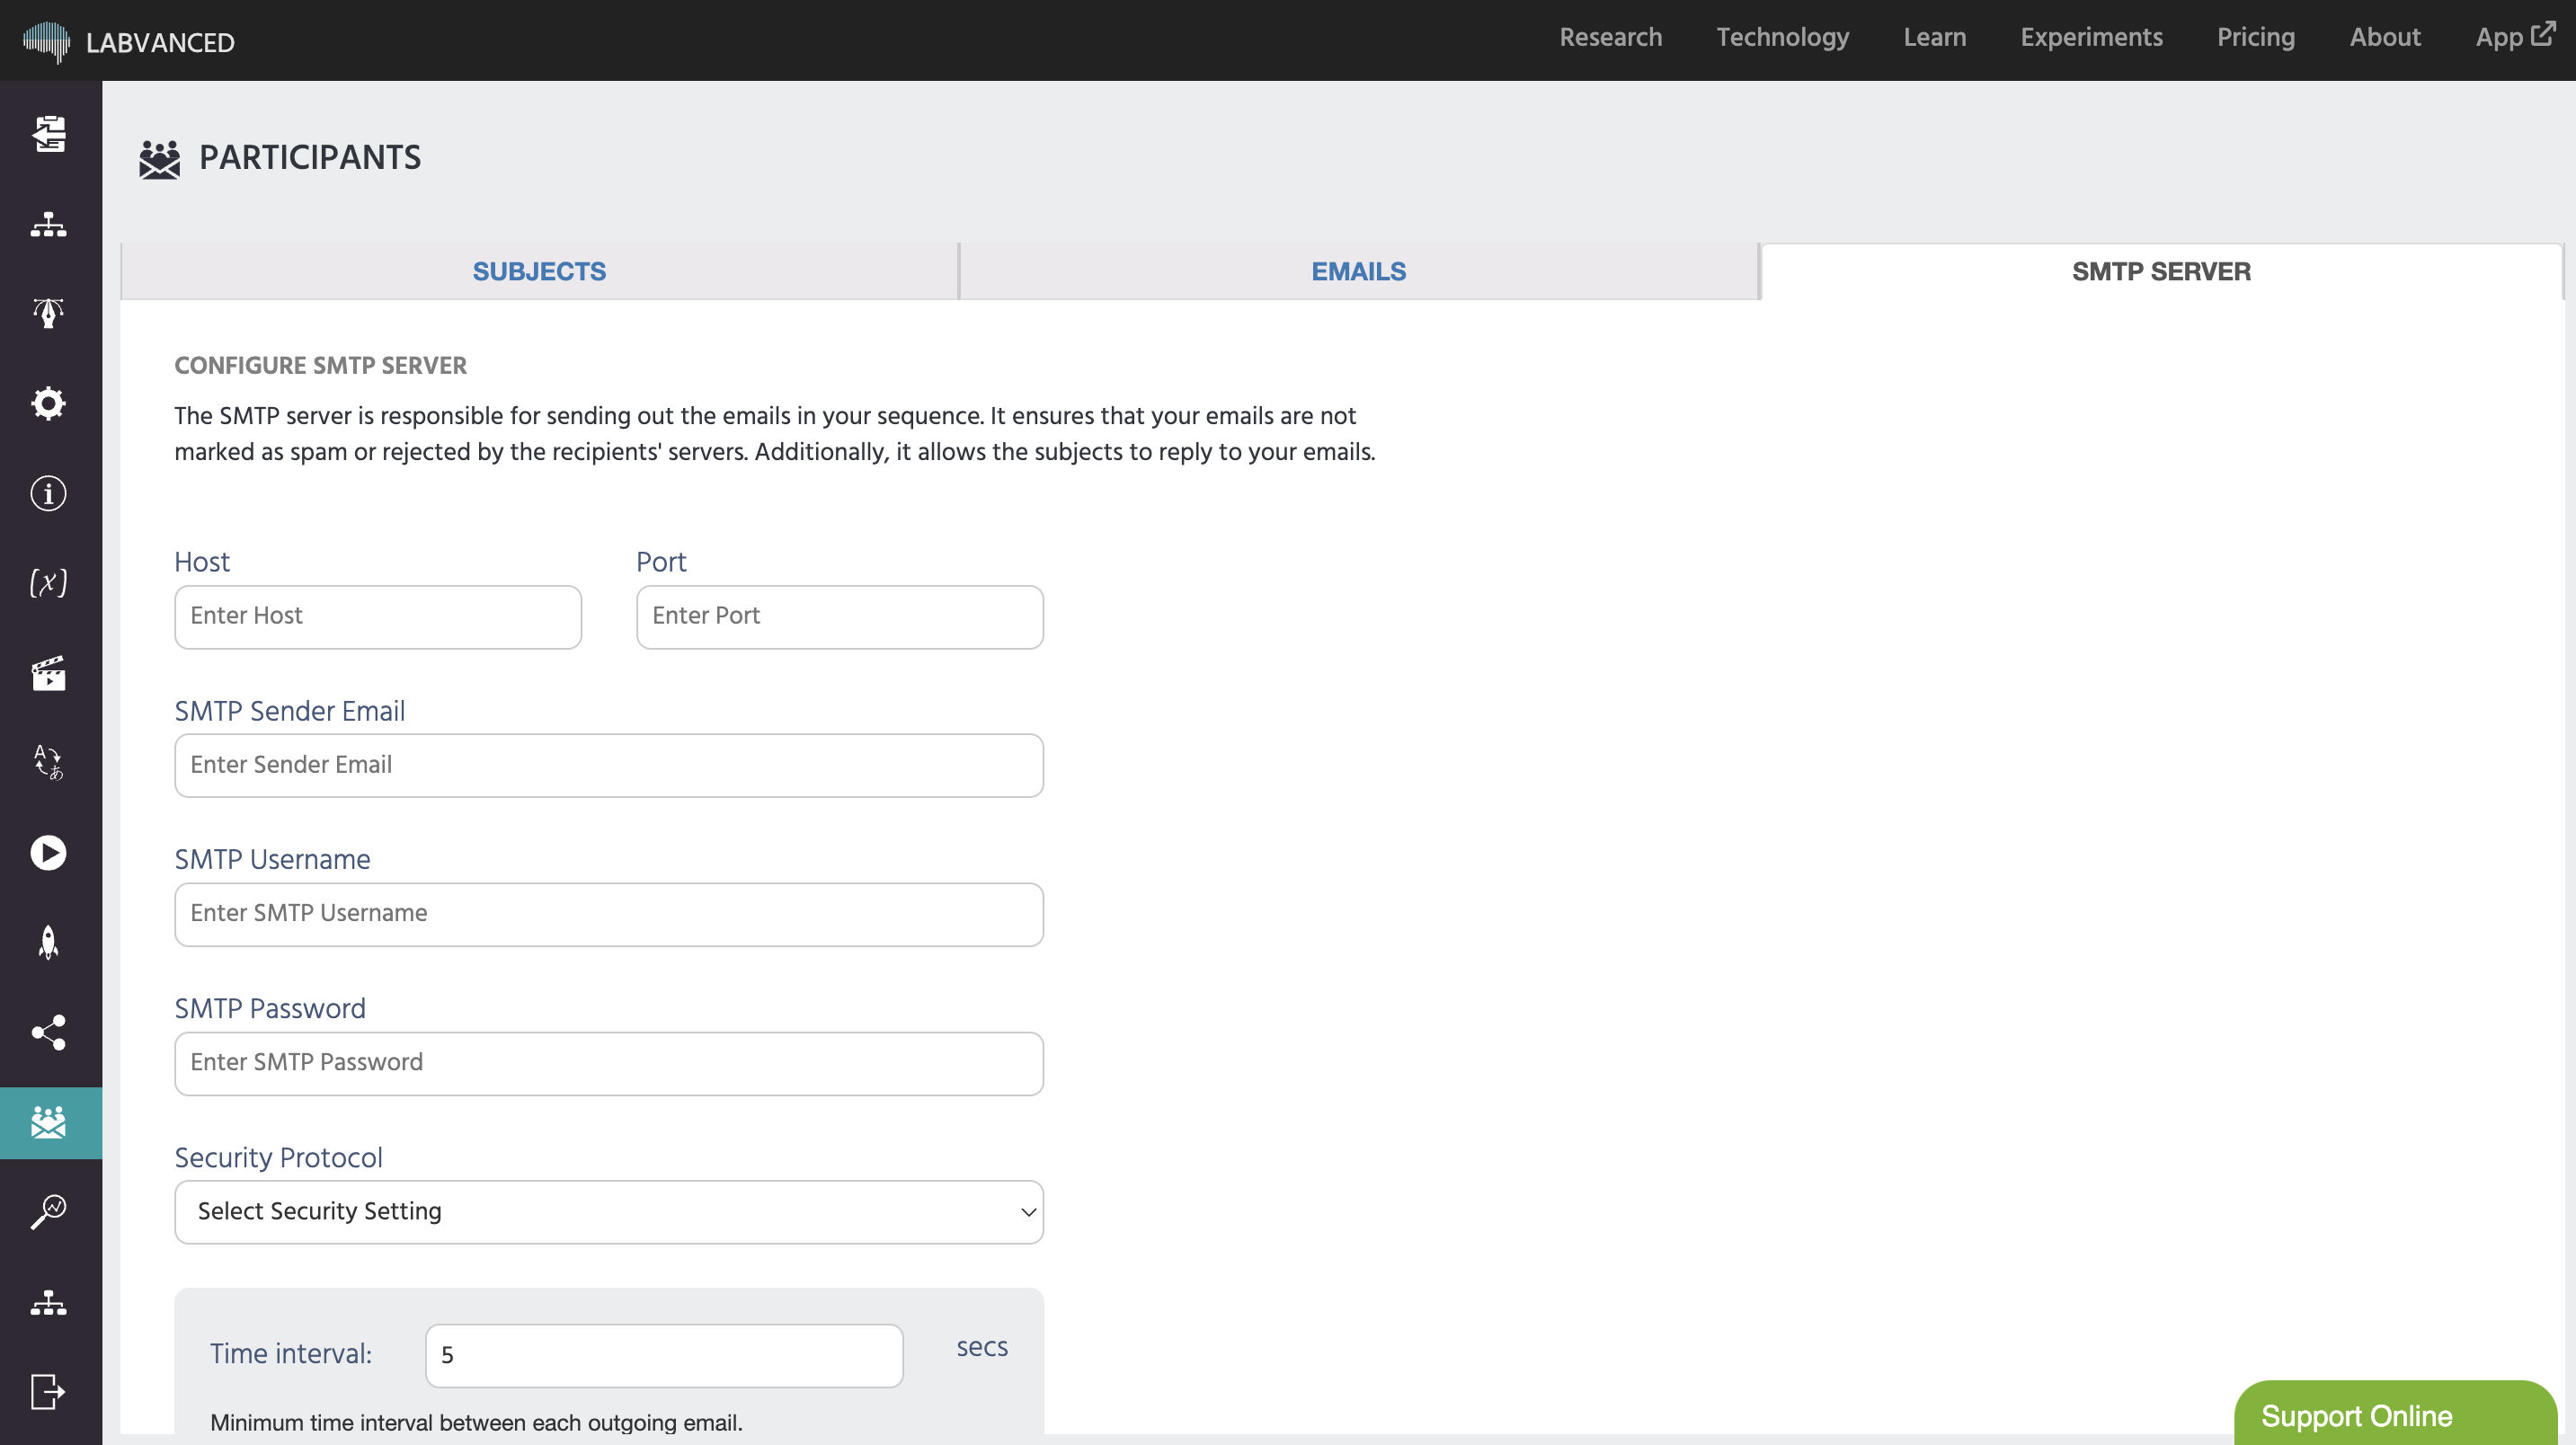
Here, you must fill in information for establishing this server connection, such as the Host, Port, email address, as well as the security protocol you want to establish (where the options are: TLS, STARTTLS, and none), as well as the minimum time interval in seconds between each outgoing email.
If you have any questions, please feel free to reach out to us via our support chat or email!